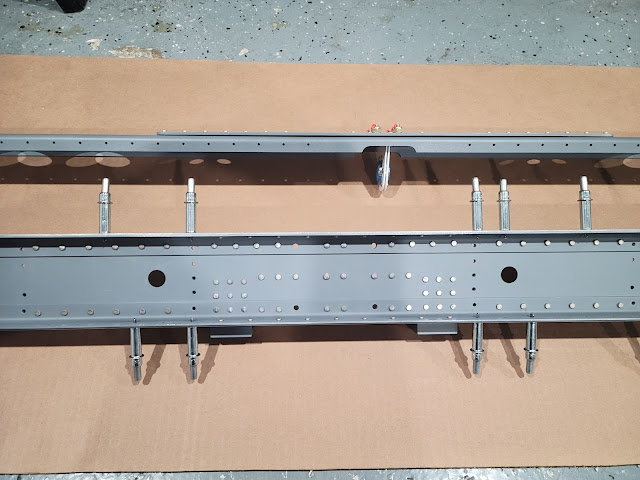
Horizontal Stabilizer 8-5-3 to 8-7-5
While waiting for a replacement front spar doubler, I proceeded to start preparing the inspar ribs as per the plans. This involved taking 4 of the ribs and making 2 cuts in the flanges on 2 of them, and 4 cuts in the flanges on the other 2.
I was able to do all the cuts on the band saw, but had to be careful as my 1/2" wide saw blade was a tight fit to get to some of the cuts. All the cuts were clean though, and I used the bench grinder wheels, deburring bits and scotchbrite pads to finish deburring the cuts, and the rest of the ribs including the lightening holes.
 |
| Inspar ribs with flanges cut and deburred as required |
Within a few days I received my replacement front spar doubler from Van's. I straightened and deburred it, and carefully upsized the 4 3/16" holes, and match/final drilled them to #12 after attaching the doubler to the front spar. No issues this time, and an AN3-6 bolt fit nicely through all the holes.
I checked the other 1/8" holes in the doubler to spar to determine if they needed final drilling, and had no issues putting a rivet through, so no final drilling required. Finally I countersunk the 8 holes in the front of the doubler.
With all the holes prepared, I disassembled and deburred the spar, doubler and spar cap holes. Now these parts, along with the front spar attachment brackets were ready for priming.
 |
| Replacement front spar doubler drilled successfully this time |
After priming the front spar, spar caps, doubler and attachment brackets, I proceeded to rivet the pieces together. This uses an assortment of rivets, so I just had to be careful to use the correct rivet length in the correct holes, but otherwise it was a straightforward process using the pneumatic squeezer.
I did have to drill out one of the AN426 4-6 rivets because the rivet set made contact with only half the rivet as I was squeezing, and ended up deforming the shop head, but it was easy to drill off the head and punch out the rest of the rivet shank using a 1/8" pin punch.
 |
| Front spar parts riveted together, view from front... |
 |
| ...and view from back |
Next I moved onto deburring the rest of the HS-1004 inspar ribs and HS-905 nose ribs, as well as the HS-904 ribs. There are 22 rib pieces in total, so deburring took a while but was a straightforward process.
I took extra care to round the forward flanges of the nose ribs to avoid denting the skin as the nose ribs are attached. I had some small dimples appear in the vertical stabilizer skin due to not enough rounding of those nose ribs, and I wanted to avoid that with the horizontal stabilizer. At the same time, I also wanted to make sure that I did not remove too much material from the front of the nose ribs.
 |
| Nose ribs before (left) and after (right) deburring |
After deburring all the rib pieces, all that was left was to bend the end flanges of a couple of inspar and nose ribs to a 9 degree angle. I used a couple of pieces of wood I cut to a 9 degree angle to help me bend the flanges by the correct amount. These ribs will be placed innermost on each side of the horizontal stabilizer.
 |
| Inspar and nose rib flanges bent to a 9 degree angle. |
 |
| A pile of deburred, straightened, fluted and bent-as-needed rib pieces |
 |
| Wooden blocks I used to straighten flanges to 90 degrees from the web, and in a few cases bend flanges an additional 9 degrees out, |
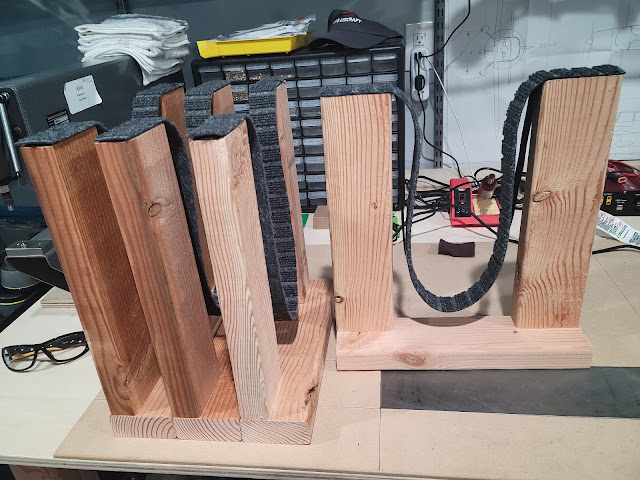
Before starting to assemble the horizontal stabilizer skeleton, I assembled cradles to hold the skins. I deviated slightly from the plans and went with straps, as other builders have done, to allow some freedom of movement when I start to drill and rivet the horizontal stabilizer. I used carpet strips in combination with a webbing strap to create the soft supports.
 |
| 4 home-built cradles that will hold the horizontal stabilizer it is assembled |
Build Hints
- Wooden blocks of various widths work well in bending rib flanges. Preferably use a hardwood to construct the blocks as there is a lot of tension while pulling/pushing on the flanges and softer woods may snap.
- The scotchbrite wedge in the dremel works well in deburring/shaping tight areas, but has a tendency to slip and wear quickly, so care and attention are needed when deburring this way.
Time Taken: 13.2 hours
Dates: August 23 - August 28, September 6 - September 10 2022
Horizontal Stabilizer Total Time: 27.1 hours
RV-10 Build Total Time: 103.1 hours
Priming Total Time: 10.8 hours (not included in build time totals)
