Vertical Stabilizer 6-5-1 to 6-6
Time to start riveting parts together. I began by highlighting the different rivet types and locations in the plans to make for quicker and easier identification of the required rivets.
 |
| An example of highlighting rivets being used on the vertical stabilizer rear spar |
I then proceeded to cleco the vertical stabilizer front and rear spar parts together.
 |
| Spars ready for riveting |
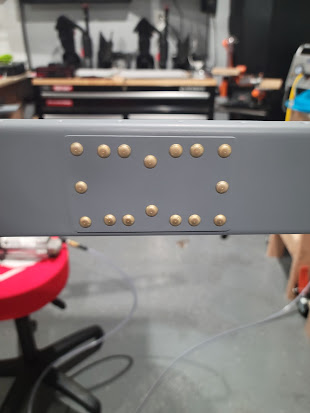
The front spar was first up, riveting the doubler plate to the bottom. I had to drill out one of the AN470 rivets as the pneumatic squeezer angled to the side a little as I was squeezing, resulting in an offset shop head. Drilling out was not an issue with the Rivet Removal tool, although I did end up with some minor scratches in the primer coat around the rivet head.
 |
| First rivets are in! |
Next up was riveting the top hinge doubler and top hinge bracket to the rear spar. These rivets had to be set in a specific order (central rivets first) to avoid losing access to those rivets once the hinge bracket was riveted into place.
Front and back views of top hinge bracket and doubler
 |
| Rear spar front side |
 |
| Rear spar inside |
With the rear spar riveted, it was now time to assemble and rivet the vertical stabilizer skeleton. The only tight spots were riveting the middle inspar and nose ribs to the front spar, and I used the hand squeezer here for more control. The bottom ribs were left clecoed in place to allow access for skin riveting later.
 |
| Skeleton (mostly) riveted together |
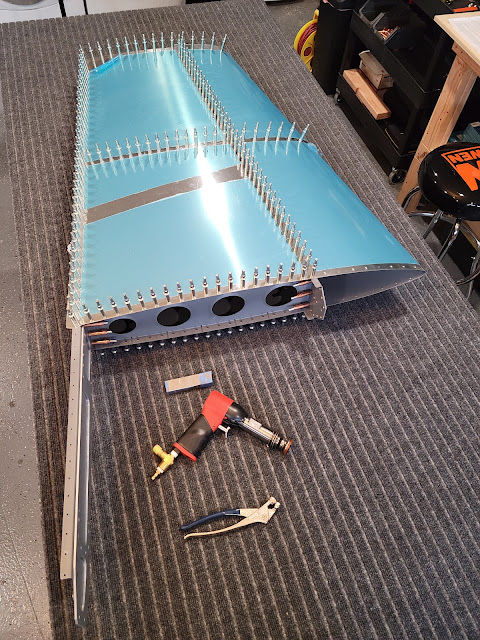
Then I began the long process of riveting the vertical stabilizer skin to the skeleton. After clecoing the skin to the skeleton I proceeded to rivet the two together in the following sequence
- Middle nose rib
- Top rib - forward of front spar
- Bottom nose rib
- Front spar
- Middle inspar rib
- Top rib - remainder
- Bottom inspar rib
- Rear spar
Riveting went really well until I got to rivet the bottom ribs to the forward spar. Although I encountered a similar situation for the middle ribs, this location proved too tight to get a squeezer (pneumatic or manual) to sit comfortably on the universal head. I felt my only option was to use an offset 1/8" cup set with the rivet gun and bucking bar to set the three AN470 4-4 rivets. I had to turn the regulator up a few notches to get the shop heads to form well, and as a result I ended up with a couple of smilies around the rivets, however those will be hidden, so I am not concerned. The shop heads turned out well though. The manufactured heads look a little worse for wear (some scuffing of the anodized coating on the manufactured head), but they otherwise appear to be fine when examined with a magnifier.
I did drill out a couple of rivets during this bottom rib challenge, including one that I had previously set in the front spar doubler because that shop head got scratched while I was trying to pry out the shop head of one of the bucked rivets. In hindsight, it would probably have been better just to leave it alone, as I ended up slightly enlarging the hole while drilling it out. The AN470 4-5 rivet that I put back in there went in fine with the squeezer, and appears to have filled the hole with a nice shop head, but the head thickness is less than (although still at minimum spec) the surrounding equivalent rivet shop heads. I might revisit this, but I'm hesitant to try drilling it out again and using a longer rivet, as I have discovered rivets with shafts longer than -4 are extremely hard to pry out after drilling off the head (that partly contributed to the enlargement of the hole).
Anyway, I'll let the EAA tech counselor look at it and advise me otherwise if needed.
 |
| Verical stabilizer skin clecoed up and ready to rivet |
 |
| Middle nose rib riveted to skin, shop heads look good |
 |
| Front spar riveted to skin |
 |
| Front spar again... happy with the shop heads |
 |
| Middle inspar rib riveted |
 |
| Vertical stabilizer riveting complete |
All that is left now is to attach the bottom hinge bracket to the rear spar and then the vertical stabilizer will be complete.
Build Hints
- Highlight rivets needed in plans to reduce chances of picking wrong rivet when riveting pieces together.
- When using the pneumatic squeezer, ensure that squeezer body is parallel to rivet shaft prior to squeezing, otherwise the squeezer and rivet shaft are likely to lean over while squeezing.
- Squeeze slowly with the pneumatic squeezer for better control at the start of the squeeze.
- When encountering unexpected situations (e.g. squeezer not fitting squarely onto rivet), take a step back and see if you can carry on with next tasks, and revisit challenging situations at a later time after having thought some more about a resolution. The plans don't necessarily need to be followed in exact order, and this approach will help reduce the likelihood of making the situation worse.
- Do not be in a hurry to drill out rivets that don't look perfect. Slightly underdriven or overdriven rivets are fine... small scratches on the rivet head(s) are also fine and can be buffed out if desired. Drilling out a rivet, especially >= 1/8" diameter rivets or rivets longer than a -4 may well make the situation worse by enlarging the rivet hole.
- Offset rivet sets require higher PSI to drive the rivet due to the energy of the rivet gun not being directed straight down the shaft of the rivet set.
Time Taken: 13.6 hours
Dates: August 3 - August 8 2022
Vertical Stabilizer Total Time: 33.8 hours
RV-10 Build Total Time: 53.2 hours
Priming Total Time: 8.8 hours (not included in build time totals)


