Van's Trailing Edge Kit - Part 1 - 2nd Attempt
Before starting on the RV-10 empennage, I wanted to try building another trailing edge practice kit. My goal was to compare it to the first trailing edge that I built back in May, and see if it looked any better, which I would hope would indicate that my skills (drilling, deburring, riveting etc) had improved.
So here I go again with the first part of the trailing edge kit...
 |
| Parts prepped for drilling |
I decided to try countersinking by putting the countersink cage in the drill press. This was the first time I used the countersink cage this way... previously I had always put it into the air drill. With the drill press, I found adjustments of the cage far more intuitive (turn bottom of cage to the right to go deeper, and left to go shallower on the countersink). Once dialed in, I was able to get consistent, perpendicular countersinks each time. I'll therefore be using the drill press to countersink whenever I can.
All other aspects of parts preparation including drilling, match-drilling, deburring, and dimpling went as expected with no issues. I also remembered to form the top skin edge before dimpling... something I had forgotten to do the first time around!
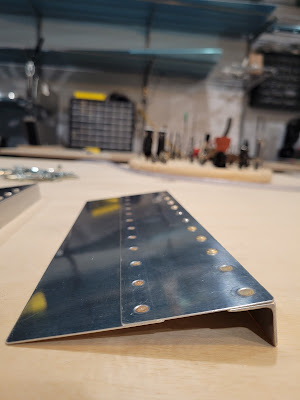
Once riveting was complete, I compared both attempts at this part of the practice kit. The results were very similar. I do think the countersinking worked out slightly better on the 2nd attempt due to the countersinks being slightly deeper for the dimple, but I'd be happy with either piece on my airplane. I do also like how straight I managed to get the rivet lines in the 2nd attempt compared to the 1st. Comparison photos are shown below. |
| All drilling, deburring, dimpling and countersinking complete... ready to rivet |
 |
| All done... 1st attempt (left) and 2nd attempt (right) |
 |
| and bottom side... 1st attempt (left) and 2nd attempt (right) |
Shop head comparison
Top Side comparison
Lessons Learned
- If practical, use the countersink cage in the drill press for more consistent countersinks.
- Adjusting the edge forming tool, start with a very light touch against the skin and then add an additional < 1/8 turn. Anything other than an initial light touch will result in the tool gripping the skin too tightly when trying to form the edge.
Date: June 22 - June 23 2022
Time Taken: 2.2 hours


