Van's Light Box Practice Kit
The Van's Light Box kit was a lot of fun to build, and a project in which I got to make some decisions as to how I wanted to rivet the light box together.
 |
| Parts laid out (and a big plan sheet) |
The first step was dimple the nutplates that would be used to attach the back cover to the light box. Once dimpled, the nutplates were riveted to the rear brackets using the pneumatic squeezer.
The next steps involved preparing the remaining parts for riveting. Here is where I got to decide which rivet types/techniques I would use to construct the light box. I chose
- countersunk AN426 3-3.5 rivets for the front panel
- AN470 3-3 universal rivets for the top panel
- LP4-3 pulled rivets for the bottom panel
- dimpled AN426 3-3 rivets for the side panels
This would give me practice in setting several different rivet types, as well as back riveting, squeezing and bucking.
I did decide to use 3-3.5 rivets on the front panel, rather than the called for 3-3 rivets, as I felt that with the thickness of the front panel 3-3 rivets were not long enough. For this project, using 3-3 rivets probably wouldn't have mattered even if the shop heads were rather short, but if this had been an airplane part I would definitely feel more comfortable with 3-3.5 rivets, and the shop heads being within spec.
 |
| Parts prepared for riveting |
 |
| Brackets riveted to front panel by back riveting |
 |
| Bottom panel holes upsized to #30 to accommodate LP4-3 pulled rivets. Top and bottom panel holes deburred |
 |
| Brackets attached to side panels using pneumatic squeezer |
Now that all parts were ready for riveting it was time to put everything together. The side panels were first attached to the front panel using a tungsten bucking bar and mushroom set in the rivet gun. The same technique was used to rivet the top panel to the front and side panels, but with a 3/32" cup set in the rivet gun. Once that was done, the pneumatic rivet puller was used to set the pull rivets to attach the bottom panel to the front and side panels.
 |
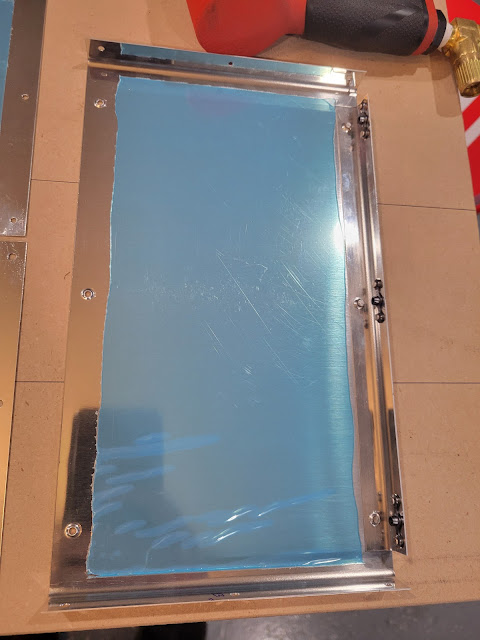
| All panels riveted together... |
 |
| ...except for the back panel which will be screwed on |
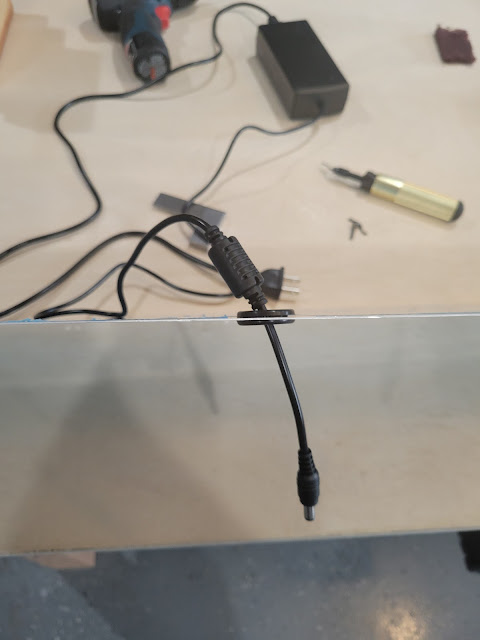
Now it was time to put in the LEDs that would light up the light box in Van's signature orange glow. This involved drilling a 3/4" exit hole for the power wire using the step drill. This was my first time using a step drill, but it went smoothly with the drill press once I figured out that I had to clamp the piece to the drill table and slow the drill right down (~1200rpm).
Once the hole was drilled, I deburred the edges and inserted the rubber grommet that was provided with the kit.
 |
| Power cable passing through grommet in back panel |
With power cable access done, next I had to attach the LED light strip to the inside of the light box. The LED strip has an adhesive backing, so it was just a matter of sticking it in place. I did find, however, that the strip stuck better if the aluminum was first scuffed using a ScotchBrite pad.
 |
| LED light strip attached inside light box |
 |
| First light! Looks cool! |
Finally, I removed the remaining blue plastic, cleaned the aluminum surfaces using acetone, and placed the light box where I can show it off best!
 |
| Airplane factory ready to start RV-10 production! |
 |
| ... and now with stickers!!! 😀 |
Lessons Learned
- The step drill needs to be run at a slower speed (~1200rpm) and the work piece must be securely clamped to the table. Also, using the drill press helps a lot in getting nice round holes.
- Scuffing the aluminum where adhesive will be used helps immensely with adhesion. Prior to scuffing, the adhesive does not stick well.
Date: June 2 - June 5 2022
Time Taken: 7.25 hours

