Going forward in my build log, I will start combining sections of the build into one log entry. The reason for this is that I am no longer completing a single section before moving to the next, and there is a fair amount of jumping around between sections as I optimize use of my build time and also figure out some of the customizations and modifications that I am making.
This log entry combines parts of both the firewall (27) and forward fuselage and bottom skin (28) sections.
With all firewall and forward fuselage parts prepared and ready for final assembly, I got everything primed over a few days in batches.
 |
| First batch of parts ready for priming |
Next began assembly, starting with a lot of nutplates...
 |
| Nutplates attached to the tunnel scat tube support |
 |
| Nutplates attached to the tunnel access panel doublers |
 |
| Tunnel access panel doublers were then riveted to the forward ribs (tunnel sides) |
 |
| Nutplates attached to the forward ribs |
 |
| Nutplates also attached to the outside of the forward ribs. These will later be hidden under the floor panels |
In order to protect the bearing in the control column mounts from primer, I created and 3D printed some temporary caps to fit over the bearing, held in place with hex screws and nuts.
 |
| 3D printed caps to avoid getting primer in the control column mount bearing |
 |
| Control column mounts ready for priming |
I also riveted the nose gear tension fittings and center angles to the forward ribs, and primed the remaining batches of firewall and forward fuselage parts.
 |
| Bucking the nose gear tension fitting rivets |
 |
| More firewall forward parts primed... |
 |
| Side plates primed |
 |
| Control column mounts primed. Bearing covers worked well. |
 |
| Bottom skin primed |
 |
| Forward floor panels primed |
As I will be installing an SDS EFI system, I will not need a separate mixture control (only a mixture adjustment knob on the panel). I therefore did not follow the Van's instructions to drill 3 cable control pass-thrus through the firewall recess and instead looked into ways of drilling just 2 pass-thru holes for the throttle and prop cables.
I decided to use the pass-thru fittings from
Firewall Fittings and reused Allen Glen's design for a
drill template that would accommodate these fittings while removing the 3 holes that are predrilled in the recess. To make the 1-1/8 inch holes required for the fittings I'll be using a
GreenLee punch that I ordered. Punches produce much cleaner large holes in the stainless steel than drilling alone. The only downside to punches is that they are rather expensive, but I figured I can always recover most of the cost by selling them on later.
 |
| Using a step drill and a fair amount of cutting fluid to upsize the holes in the firewall recess in order to accommodate the punch draw stud |
 |
| 3D printed template clecoed in place, and slowly punching through the first hole |
 |
| First control cable hole punched cleanly with minimal burrs |
 |
| After punching the first hole, I used a #40 bit to match drill the holes for the #4 screws that will be used to secure the passthru fitting. These were match drilled directly through the template |
 |
| Second control cable punched and all hole edges deburred |
To accommodate a fuel return line, I also had to create a mirror image of a prepunched hole that was put in for the 'fuel in' line.
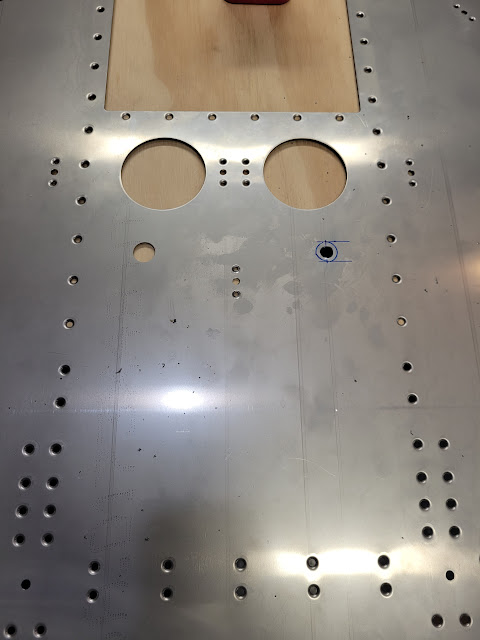 |
| After marking the hole position at the desired location, I again used a step drill (and a fair amount of cutting fluid) to upsize the hole for a 9/16" punch draw stud |
 |
| I was then able to punch out the hole to the exact size and clean up any burrs |
Primer used: ~552 + 53g distilled water
Priming Time Taken: 7.5 hours
Time Taken: 8.0 hours
Dates: April 22 2025 - May 5 2025
Firewall Total Time: 43.2 hours
Fwd Fuse Ribs, Bhds & Bottom Skin Total Time: 27.9 hours
RV-10 Build Total Time: 1040.0 hours
Priming Total Time: 133.5 hours (not included in build time totals)


