Posts

Showing posts from April, 2024

Priming - Wing Outboard Leading Edge 17-3-10

Image
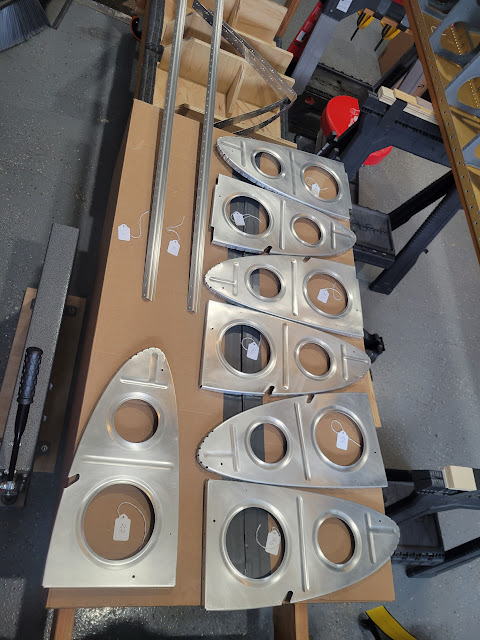
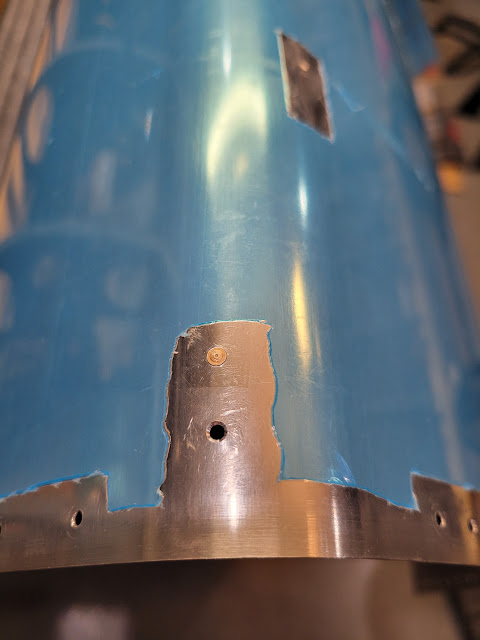
With all outboard leading edge parts dimpled, I moved on to priming them. Nothing complicated here, just had to keep track of the position of each rib in the leading edge using tags. Right outboard leading edge ribs, skin stiffeners and splice plates prepped with EkoEtch Outboard leading edge internal parts primed with EkoPrime. Only the left leading edge ribs remain to be primed. Since the weather was perfect for priming, I also took time to prep and prime the outbaord leading edge skins. Skin ready for cleaning with EkoEtch Right outboard leading edge skin etched and ready for priming Left outboard leading edge skin etched and ready for priming Outboard leading edge skin primed  Left leading edge ribs primed. Now all parts in both leading edges are ready for final assembly Primer used:   ~380g + 38g distilled water Time Taken:      6.6  hours Dates:                    April 11 - April 21 2024 RV-10 Build Total Time:      647 .0  hours Priming Total Time:                80.0  hours  (

Wing Outboard Leading Edge 17-3-9, 17-3-12

Image
In-between top wing skin riveting sessions, I continued working on the outboard leading edges.  First off I filled the stall warning slot holes in both leading edge skins as I will not be installing the standard stall warning system (instead going for an angle-of-attack indicator).  To fill these holes, I decided to deviate from the plans, and instead used NAS1097 "oops" rivets. The advantage of using these, as opposed to standard AN426 rivets, is that they require only a shallow countersink to sit flush, rather than a full 3/32" dimple. rv10.org also suggested that a dimple at this location might deform the curve in the skin, so I chose to countersink instead. After countersinking, the "oops" rivets were set using the Cleaveland Main Squeeze as I wanted full control over this process. I did run into an issue, however, while adjusting the squeeze depth as one of the left leading edge rivets did not sit entirely flush, and after squeezing I noticed some minor de

Top Wing Skins 16-3-1 to 16-3-3

Image
With the skeletons of both wings assembled, I was now ready to begin attaching the top skins.  Starting with the right spar, I placed it across 4 saw horses that I had modified to ensure they were all roughly the same height. Using a laser level, I put shims under the spar along the sawhorses until the spar was uniformly straight along its entire length (zero bow). I then used a box level to ensure that there was no twist in the spar, and finally clamped the spar securely to the sawhorses at both ends. Using a laser level to ensure that the main spar is straight, not bowed, and supported well across each saw horse Main spar clamped at inboard end... ...and at outboard end to prevent any movement Spar was also checked for level between each pair of ribs to ensure that it was not twisted Main spar leveled, clamped and ready for attaching top skins Next I positioned the skin stiffeners in place, and then clecoed the inboard top skin and wing walk doublers onto the ribs. I wasn't happy

Wing Rear Spar 15-5-4

Image
After priming the rear spars, I temporarily clecoed them to the wing ribs (ensuring the main spar was not twisted), and then clecoed the doublers and hinge brackets to the rear spar. I decided it would be easier to squeeze rivets in the doubler/bracket to spar attachment holes which were not also attached to the wing ribs, so after clecoing everything together on the wing, I removed the spar to rib clecos and clamped the spar on its side to the workbench. I also taped off holes not to be riveted so as not to make any mistakes. Final fitting of the rear spar and attachment to the (left) wing ribs prior to riveting Right rear spar and attachements clamped to the workbench Squeezing the majority of the rivets was relatively easy, however there were a few that had to be bucked around the inboard aileron hinge bracket. Bucking the rivets next to the inboard aileron hinge bracket. Easy using the longer 7" rivet set for clearance Inboard aileron hinge bracket riveted to the rear spar and

Priming - Top Wing Skins 16-2-6

Image
With another break in the recent rainy weather, I decided to start prepping the top wing skins for priming.  I will be priming only the mating surfaces on the skins to minimize the amount of primer weight added to the wings. To mask off the areas not to be primer/prepped, I cut 3mil plastic sheet into squares (sized to the appropriate wing skin sections) and taped them in place. I'll need to do this twice (once for applying EkoEtch, and again before spraying EkoPrime), although I will be reusing the plastic sheets in both cases. Inboard top wing skin masked off. I will be priming the entire skin area under the wing walk doublers, as well as both sides of the doublers themselves Outboard top wing skin masked off. I left roughly an inch for priming along the rivet lines. Next I applied EkoEtch to the skin stiffeners, wing walk doublers and top wing skins.  Skin stiffeners and wing walk doublers drying after being treated with EkoEtch Inboard wing skin after EkoEtch treatment Outboard