Wing Ribs 14-2-1 to 14-3-4
Rather than waiting for Van's to send me parts to replace the laser cut parts that were recommended for replacement, I decided to go ahead and order a few parts so that I could move forward with wing construction. These punched parts arrived within a week and will allow me to fully construct the main wings with the exception of the flaps and ailerons for which I an fine getting replacements parts later.
After studying the plans, I separated the ribs in to two piles, left wing and right wing, and placed the ribs in the order that they will be attached to the spar. I also removed all stickers, and labeled each of them 1L-15L and 1R-15R (30 ribs in total).
With the ribs labeled, and blue vinyl removed, I proceeded to work on the left wing pile of ribs, to straighten and flute each of them as needed. I also took this time to debur all edges.
There are two ribs in each wing that need to have parts of the flanges removed. I took care of these with a cutoff wheel in the Dremel, followed by cleanup and deburring on the disc sander and deburring wheels.
 |
| Notched inboard wing rib. This allows for clearance from the outboard most fuel tank attach nutplate |
 |
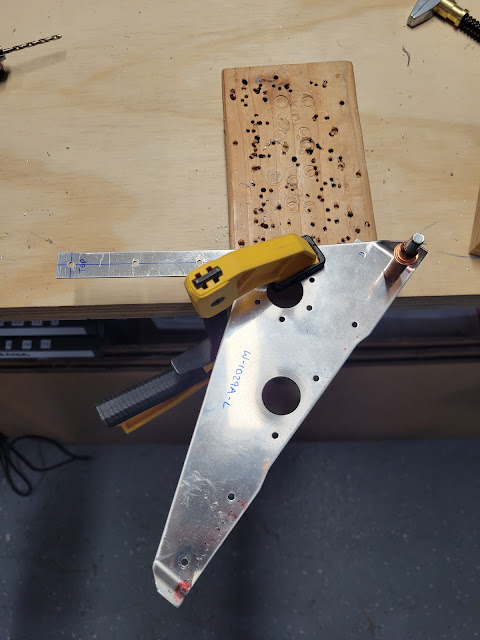
| Outboard wing rib clamped prior to removing the aft flange using a cutoff wheel |
 |
| Trimmed outboard wing rib. Flange has been removed, but radius was left in place... |
 |
| ...to maintain edge distance and strength for the holes near that flange |
I also separated and labeled the left and right flap hinge parts, and deburred all edges of the flap hinge ribs, torque tube support brackets and flap hinge brackets (remember to peel the clear plastic off these; it can be hard to see).
 |
| Left wing rib parts, edges deburred and sharp corners rounded |
With edge deburring of the left wing ribs complete, I then clamped the previously fabricated spacers to the torque tube support bracket and match drilled the #30 holes.
 |
| Match drilling the long spacer... |
 |
| ...and then the short spacer. Here I used the long spacer for additional support! |
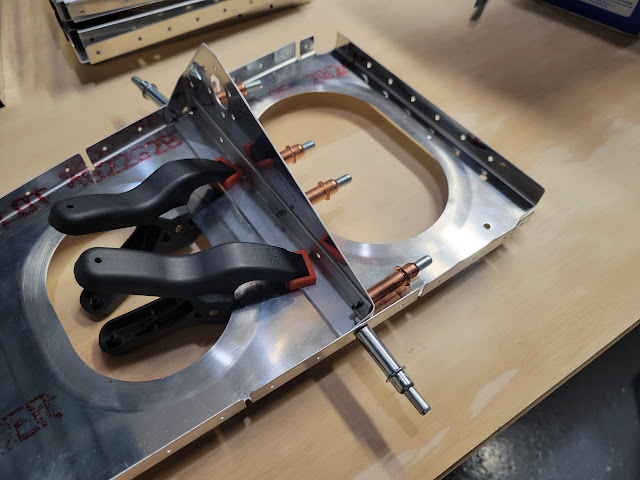
I then deviated slightly from the plans for match drilling the W-1029C angle. Rather than assembling the entire torque tube support bracket assembly (which made clamping the angle difficult because the spacers had to be left out temporarily), I instead just clecoed the aft torque tube support bracket to the inboard wing rib flanges, and used spring clamps to hold the angle in the correct location.
 |
| Angle clamped in place against the wing rib and the aft torque tube support bracket |
I then unclecoed the torque tube support bracket from the rib flanges, and while keeping the angle clamped in the correct location, was easily able to match drill the angle to the bracket without the rib being in the way.
 |
| Match drilling the angle to the torque tube support bracket, after clamping it in the correct location so it would sit flush against the wing rib |
Once the angle was match drilled to the torque tube support bracket, I reclecoed the bracket to the wing rib and with the rib held stationary in the vice, I match drilled it to the angle.
 |
| Match drilling the angle to the inboard wing rib |
Next I clecoed to flap hinge rib and bracket to the inboard wing rib, and final drilled all the holes to #30. Note that while the flap hinge bracket has all holes drilled, only two come final sized so they can be clecoed. The remaining holes are all #40 and need to be upsized to #30 (I used a 1/8" drill bit followed by a #30 reamer).
Having match drilled the flap hinge parts to the W-1010 rib, I followed a slightly different process to do the same for the two W-1011 ribs in order to obtain an even tighter tolerance. I first clecoed the flap hinge rib to the flap hinge bracket and final drilled the holes into the bracket using a 1/8" bit followed by a #30 reamer.
 |
| Flap hinge bracket and rib clamped tightly and final drilled. |
I then clecoed the W-1011 rib to the final drilled flap hinge bracket and rib, and match drilled the same holes to the wing rib (again using a 1/8" bit followed by a # 30 reamer). This order of operations gave me much better control while first drilling through the thicker bracket material, and then drilling new holes into the wing rib, and resulted in nice, clean and round holes in all parts.
 |
| Final drilled flap hinge parts clecoed to wing rib and match drilled. Assembly is held tightly by clamping the flap hinge bracket |
 |
| W-1011 flap hinge attachment holes match drilled and final sized |
Build Hints
- Flap hinge brackets came covered with a clear plastic that can be easy to miss.
- Inboard rib angle can be match drilled using just the torque tube bracket that it sits flush against, rather than the whole torque tube assembly.
- Flap hinge brackets can be final drilled to the flap hinge ribs first, prior to attaching to the wing ribs. This provides for better drill control, especially when match drilling to the W-1011 wing ribs because the flap hinge bracket holes have already been final sized.
Time Taken: 13.3 hours
Dates: December 11 - December 19 2023
Wing Ribs Total Time: 17.0 hours
RV-10 Build Total Time: 556.0 hours
Priming Total Time: 50.9 hours (not included in build time totals)


