Horizontal Stabilizer 8-13-2 to 8-14
Continuing on with the horizontal stabilizer, I began riveting the front spar flanges to the skins. There is nothing too tricky about this step, except that it involves bucking 232 rivets and squeezing another 8!
I am currently able to buck an average of 1 rivet every 2 minutes or so (including inspecting, moving parts/clecos around and all the other small things going on during the bucking process), but I feel that will improve over time as I get more experience.
I started riveting in the middle of each skin where the rivet size changes (from 3-4 to 3-4.5) and worked my way out toward the skin edges. To get the initial set on the rivet, I used a lower PSI and then increased the PSI (at the restrictor by 2-3 notches as needed) to fully set the rivet. This worked well and all rivets were flush to the skin, and I also did not have to drill out a single one which I was very happy with.
Rather than the standard 1" mushroom set, I used the Boeing Design Anti-Slip Flush Rivet Set with Polyurethane Rim (that I was able to find used on EBay), and this worked extremely well in helping to keep the rivet flush to the skin while staying securely in place as I was riveting.
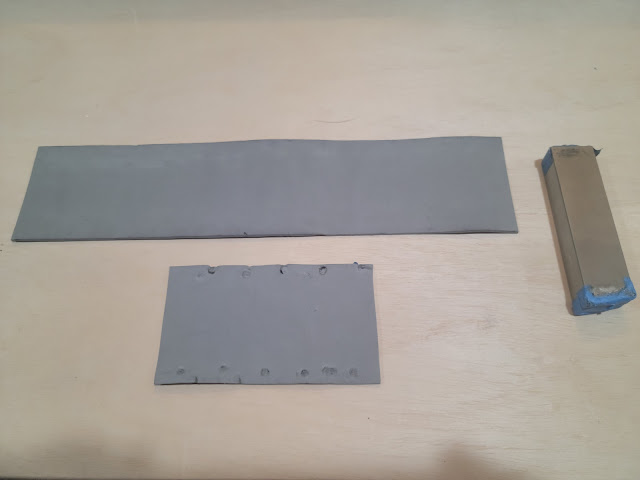
I also placed some thin foam pads (obtained from a local crafts store) along the interior bottom of the spar as I was riveting. This, in combination with taping the edges of the bucking bar) definitely helped in reducing a lot of scuffing that would have occurred on the spar from the bucking bar edges/surfaces inadvertently hitting the spar as the rivet was being set.
 |
| Foam pads and tape on bucking bar used to avoid scuffing the interior skin and spar |
 |
| Front spar riveted in place |
 |
| 3 different types of rivets used to hold the front spar in place |
 |
| In-spar ribs riveted up to the stringers I then continued riveting the skins to the stringers. The only tricky part here was riveting the bottom stringers as you cannot see the rivets without using a mirror to look from beneath. My short tungsten bar made quick work of these though, and I mainly had to make sure that the rivets were not overdriven. A few did end up slightly overdriven, but I determined that they were just in spec, so it was not worth drilling them out and increasing the risk of enlarging a hole. |
 |
| Stringers riveted in place |
Once all the stringers were riveted, all that was left was to rivet the remaining rib holes. This was a straightforward process as all the rivets are easily accessible and clearly visible during riveting. I did use tape to help hold the skins together when riveting the top rib hole, as the skin was pulling away slightly due to nothing holding it together from above, but this was a minor issue and the tape held the skins tight agains the ribs.
 |
| Only the outside ribs left to rivet |
 |
| All ribs securely riveted |
Before completing riveting of the outside ribs, I clecoed the rear spar into place just to hold the skins as tight as possible.
 |
| Read spar still fits nicely |
Once the rear spar was in place, I riveted the outside ribs using the pneumatic squeezer.
 |
| Only the rear spar left to rivet |
I then used blind rivets and universal head rivets to attach the rear spar to the inspar ribs.
 |
| Rear spar attached with only the skin to spar rivets left to do |
Next I riveted the rear spar to the skins using the pneumatic squeezer. I initially had some trouble squeezing the rivets closest to the rear spar hinge brackets (because the rivet set/yoke has to pass over the hinge bracket and universal rivet head holding that in place), and I had to drill out a couple of rivets (due to the rivet set only squeezing half the rivet). I then tried setting these rivets using the hand squeezer, but the rivets kept bending to the side as they were set so I had to drill out a couple more.
 |
| Rear spar riveted to the skins... |
 |
| ... also looking down the rear spar |
After a short pause to take delivery of and inventory my wing kit (seen sneaking into the photo above), I got around to completing the final task on the horizontal stabilizer which was (an earlier step I skipped) to rivet the innermost inspar and nose ribs to the front spar.
I used a 1/8" double offset rivet set for this and bucked the 4-7 and 4-8 rivets into place. Overall this was not too hard. I just had to adjust my air regulator up several notches in order to have enough force to set the rivets, as a lot of energy is lost in the rivet set and the longer rivets. I also used Snap-Soc rivet set caps to prevent marking the skin on the manufactured head side. These worked extremely well, and I will use them again in future when bucking universal head rivets.
 |
| Final rivets set in place... |
 |
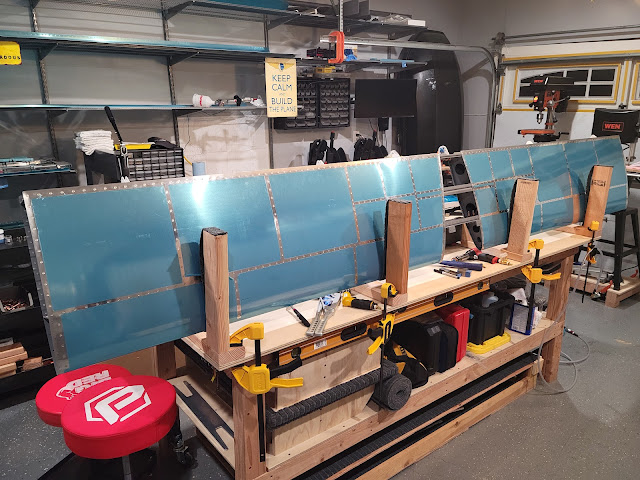
| ... and the horizontal stabilizer is COMPLETE! |
Build Hints
- Wear gloves while bucking in tight places to avoid/minimize any hand scratches and bruising.
- Place foam padding anywhere the bucking bar might hit a surface (especially skins or other thinner aluminum pieces) while bucking. This will help reduce scuffing of the surface as well as the chances of a dent occurring.
- A short, heavy tungsten bucking bar makes quick work of setting rivets if there is adequate room to hold it in place, and worked extremely well on rivets above the front spar.
- When riveting with a bucking bar in tight places, pad the end of the bucking bar as much as possible without affecting its ability to set the rivet. After completing riveting and removing the horizontal stabilizer from the cradles, I noticed a few small outward facing dents (minor and only noticeable from certain angles) at the forward end of some nose ribs. These were caused by the bucking bar hitting the inside of the skin as I was riveting. The tape I had on the bucking bar was not enough to prevent these, and the foam I used earlier was taken out as it was too thick to place there without interfering with riveting. I'll have these skin dimples fixed at paint time.
- Bucking with an offset rivet set requires the air regulator to be turned up several (5-6) notches, especially if bucking longer rivets. Marking the regulator with a sharpie helps in identifying settings especially when adjustments are being made.

