Rudder 7-5 to 7-6-11
Now that the rudder stiffeners and ribs were cut to size, it was time to assemble the rudder skeleton. I just had to pay attention to the overlapping of the stiffeners, but otherwise this was easy and I took time to appreciate how big the rudder actually is!
All the spar and rib rivet holes were already final sized. I only had to final drill the stiffener 1/8" rivet holes as they were slightly smaller than final size.
 |
| Rudder taking shape |
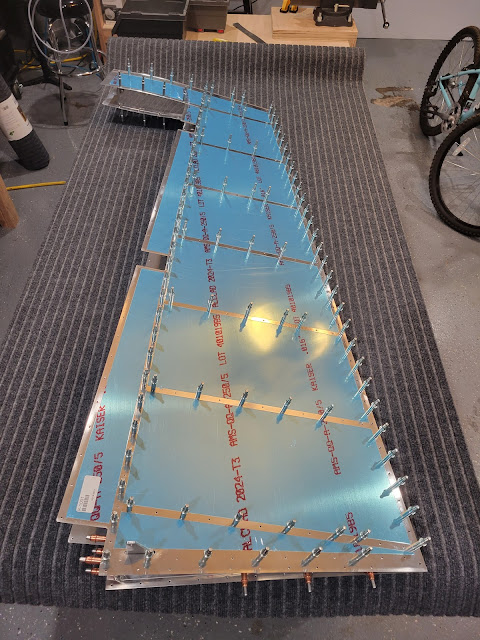
Next it was time to attach the skins to the skeleton. As usual, I removed the blue vinyl from the inside of the skins, paying attention to making sure that the skins were oriented correctly so that one was left side and the other was right side. I also removed strips of blue vinyl from the outside skin surface along the rivet lines and then deburred the skin edges and clecoed each skin to the skeleton.
Prior to clecoing the trailing edge, I trimmed the trailing edge wedge to size. Below, you can see that it was slightly longer than the rudder as received in the kit.
The next instruction specified final drilling the skins to the skeleton. The skins, spar and ribs all had final size holes and I verified this with a 3/32" rivet, however when I had clecoed the skins to the skeleton I could not get a rivet through the lined up holes. I think they were ever so slightly out of alignment, but not very noticeable to the naked eye (as seen below).
While working on the skins, I received the threaded hex drill bit adapter that I had ordered from YardStore, and I took a few minutes to finish countersinking the two holes in the rudder horn that I couldn't get to easily with the countersink cage.
 |
| The holes in the skin/spar look aligned to me! |
 |
| Now to final drill the other side of the rudder |
So I decided to final drill all holes in the skin to skeleton just to make sure I wouldn't have any issues putting in rivets later on. Once drilled it was time to disassemble all parts so that the holes could be deburred.
 |
| A lot of holes need to be deburred... on both sides... |
 |
| ...and it took a while |
While working on the skins, I received the threaded hex drill bit adapter that I had ordered from YardStore, and I took a few minutes to finish countersinking the two holes in the rudder horn that I couldn't get to easily with the countersink cage.
I used a drill bit extension to get the reach needed, but had to use the countersink pilot to place the bit in the hole before starting the drill, otherwise the countersink bit wobbled around a lot as the drill spun. Other than that, I just had to watch the countersink depth closely as there was no cage to stop me going too deep. The countersinks came out nicely though.
 |
| Countersinking without a countersink cage |
All the rudder parts were now ready to be dimpled. Only the flanges on the spar, ribs and stiffeners had to be dimpled #40 where the skin attached. For the most part I use the pneumatic squeezer to do the dimpling, but that thing gets heavy after holding it for a while, and I had to take a few breaks to rest my arm!
I also managed to dimple a lot of holes in the skins using the pneumatic squeezer. For the rest I used the DRDT-2. No problem at all! Notice that I taped off the holes that I wouldn't be dimpling just to make sure I didn't mess up.
 |
| Internal parts ready for dimpling |
I also managed to dimple a lot of holes in the skins using the pneumatic squeezer. For the rest I used the DRDT-2. No problem at all! Notice that I taped off the holes that I wouldn't be dimpling just to make sure I didn't mess up.
At this point, I decided not to dimple the trailing edge holes or put a bend in the trailing edges (as the instructions call out). I will not be priming the skin along the trailing edge, and it'll be easier to tape off those holes at priming time if they are not dimpled. I also didn't countersink the trailing edge wedge, as I first want to match drill it to a piece of aluminum angle to maintain a straight edge when I apply the proseal. I'll finish all these trailing edge steps after priming, and made notes in the plans to remind myself to do this.
Now all that is left to do before riveting is to prime the rudder pieces. Primer post coming soon!
 |
| Dimpling the rudder skins |
Now all that is left to do before riveting is to prime the rudder pieces. Primer post coming soon!
Build Hints
- Even though holes may already be final sized, when the pieces are clecoed together, holes may not line up exactly. If the rivet does not quite fit, final drill the hole(s) with the appropriate reamer.
- Use a threaded hex drill bit adapter to countersink holes in cases where there is interference with the countersink cage. Just be sure that the countersink bit spins true with no wobble while countersinking.
- Do not prime rudder/aileron inside trailing edges, or the trailing edge wedges, as this may affect adhesion of the proseal. Also, do not dimple the trailing edges until after priming as a flat trailing edge is easier to tape off.
Time Taken: 11.5 hours
Dates: July 10 - July 15 2022
Rudder Total Time: 16.5 hours
RV-10 Build Total Time: 36.7 hours
